Your eyes flutter as the overhead lights clink off. The room is filled with a warm darkness, before you turn on the televisions, which fill the room in blue light, one screen at a time. Your goal? To enter your new sequenced reality. Escape from the world.

As hard as this machine can be to get going, it is actually pretty fun for me. Here are the main instructions you use to start the machine:
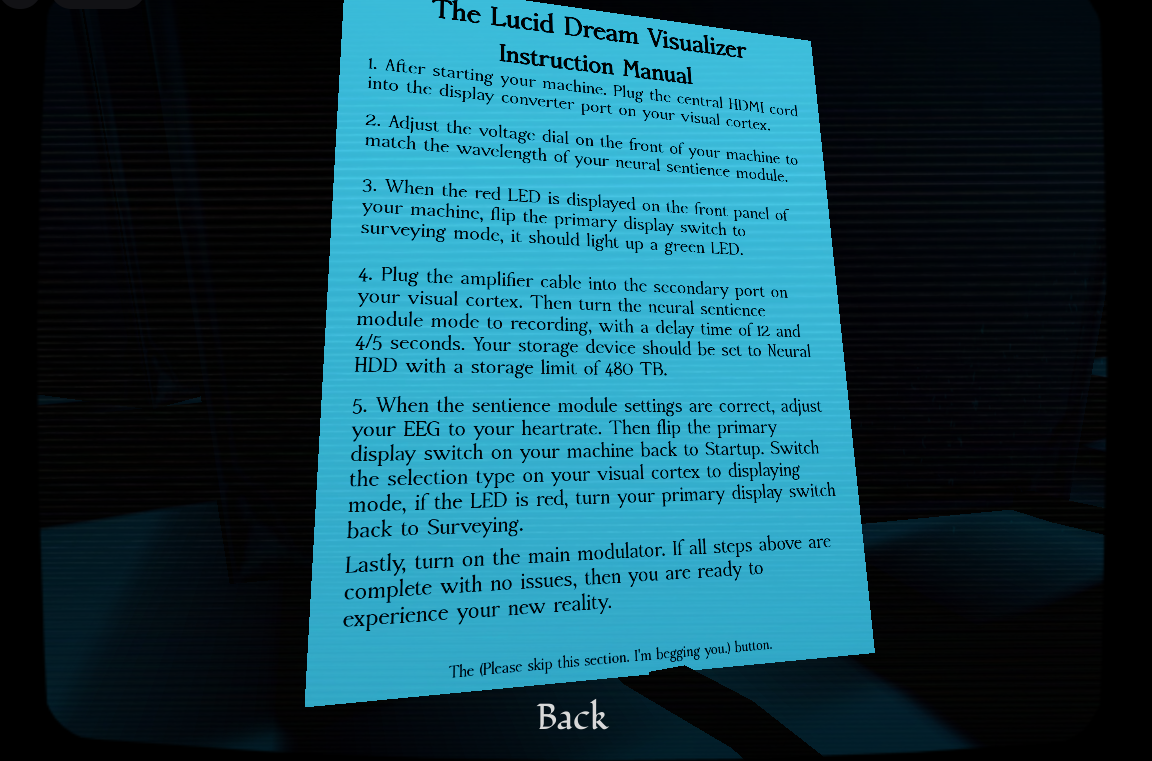
----- 1. After starting your machine, plug the central HDMI cord into the display converter port on your visual cortex. -----
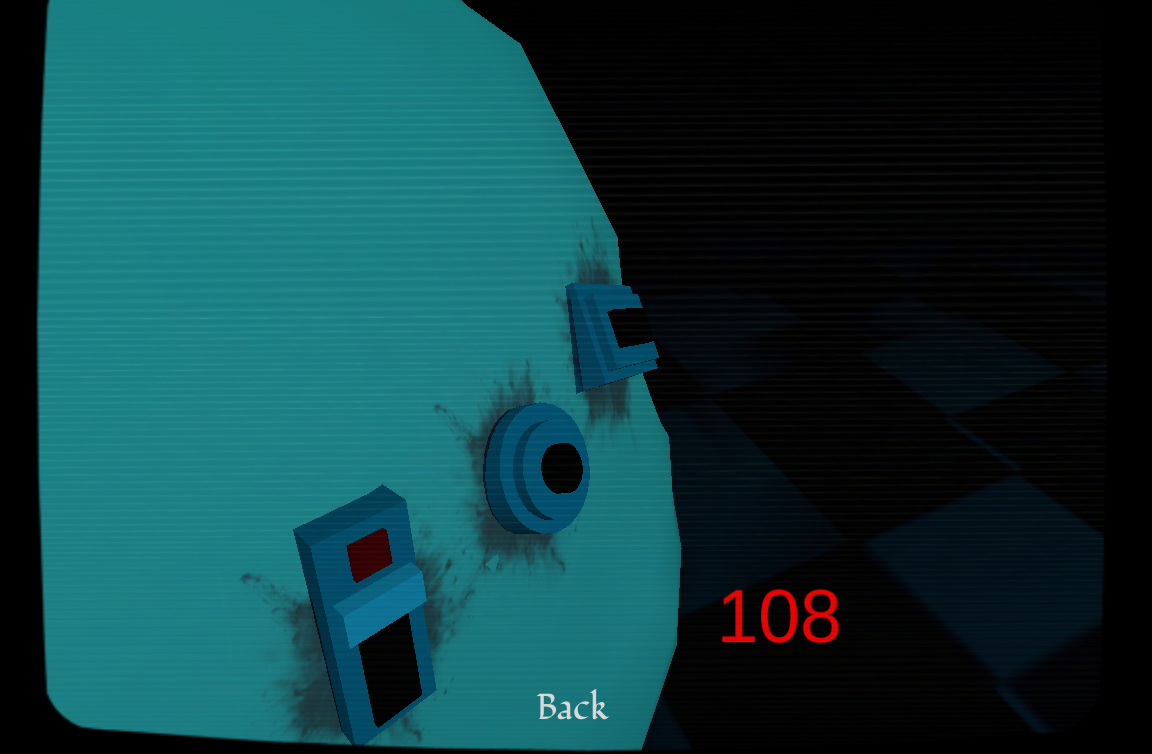
To turn on the machine and get the HDMI cord, go to the Lucid Dream Visualizer. On the far right, flick/click the switch to turn the machine on, where you should see a bright red "0" on the screen once done. When that's done, move your mouse/camera to the left , and click on the HDMI cord sitting on the machine. It should dissapear.
After that, inspect the Visual Cortex. The HDMI cord plugs into the rectangular far right outlet, simply click on it and the cord should connect.
----- 2. Adjust the voltage dial on the front of your machine to match the wavelength of your neural sentience module. -----

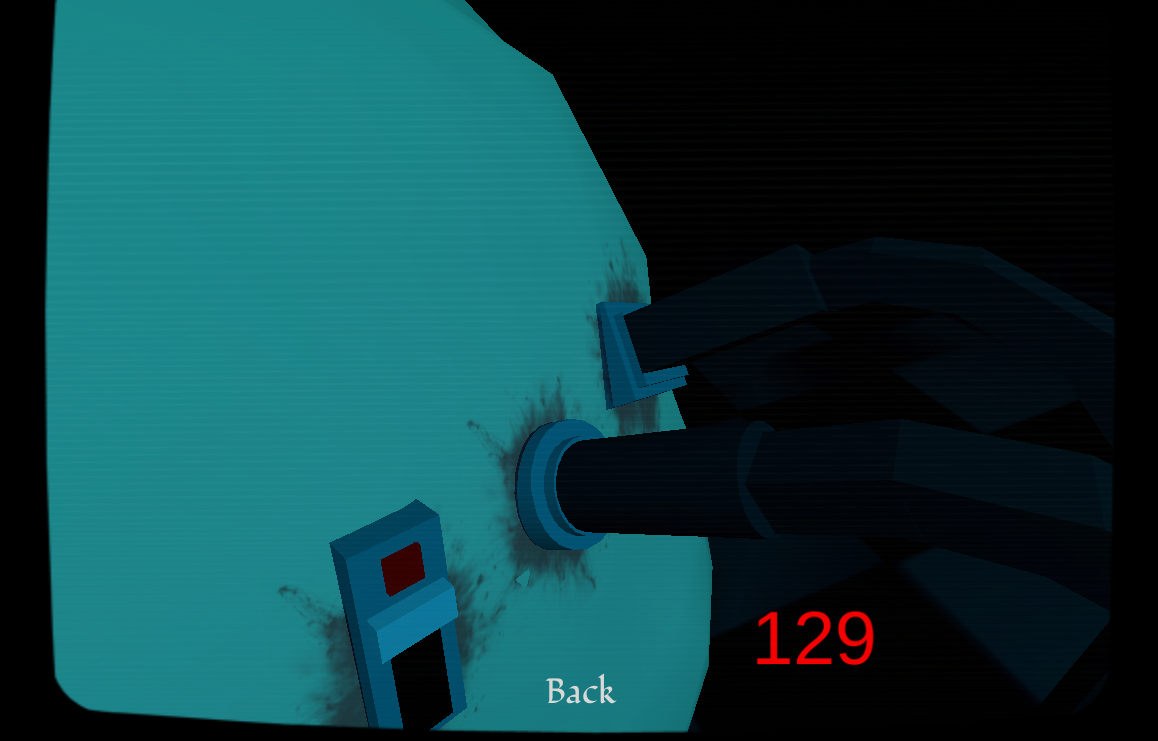
Go to the Sentience Module and examine the number displayed in bright red text. This number changes every time you start the game, so it won't be the same as mine. For this, though, mine is 28.
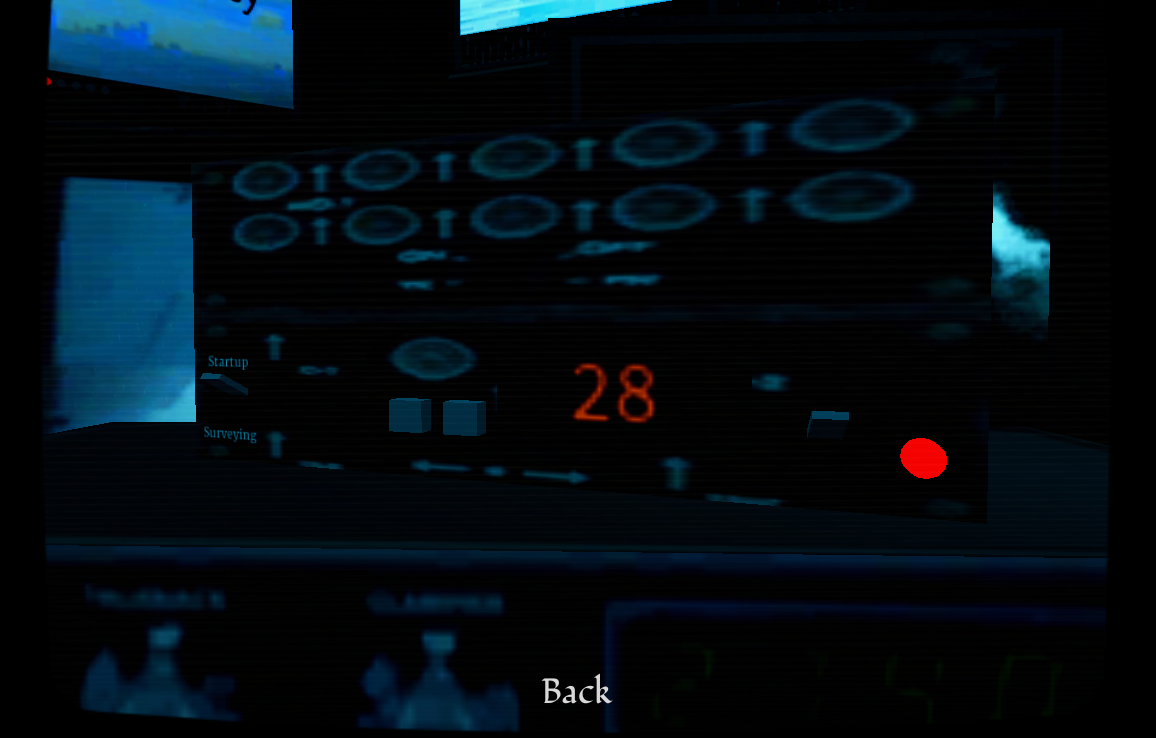
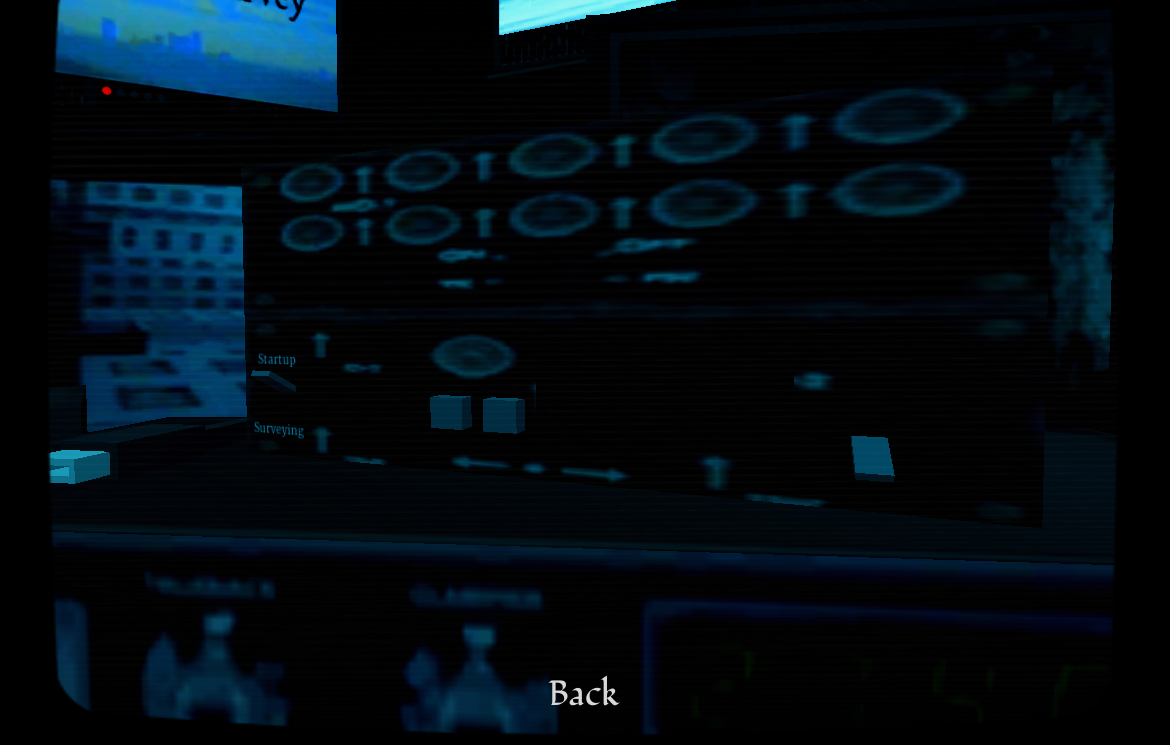
Then, go to the Lucid Dream Vizualizer ("your machine") and adjust the bright red "0" accordingly. The left switch subtracts and the right switch adds. If you do this correctly, the red LED should light up.
----- 3. When the red LED is displayed on the front panel of your machine, flip the primary display switch to surveying mode, it should light up a green LED. -----
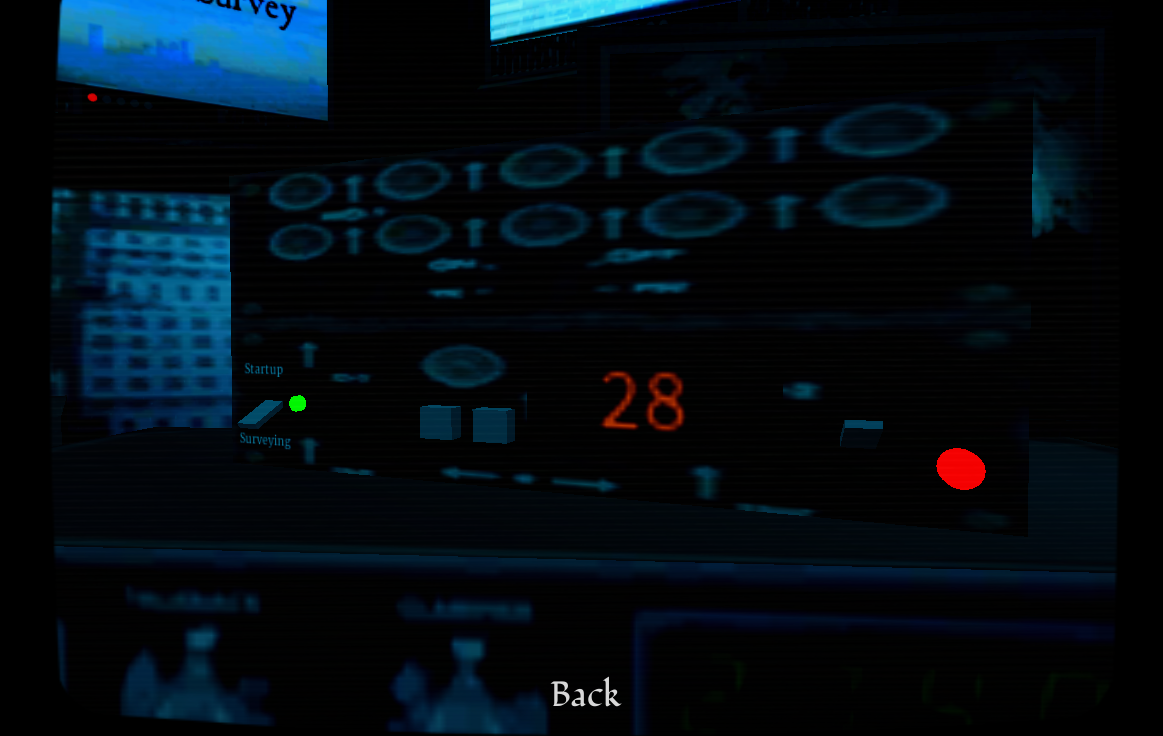
Stay at the Lucid Dream Visualizer, and flick the switch to the left of the buttons that you used to input your number. It should go from pointing to "Startup" to "Surveying", and if done right, a green LED will light up next to it.
----- 4. Plug the amplifier cable into the secondary port on your visual cortex. Then turn the neural sentience module mode to recording, with a delay time of 12 and 4/5 seconds. Your storage device should be set to a Neural HDD with a storage limit of 480 TB. -----
Firstly, Go to the Sentience Module, and collect the amplifier cable to the right of the module.
Then, plug the amplifier cable into the outlet next to where the HDMI cord is.
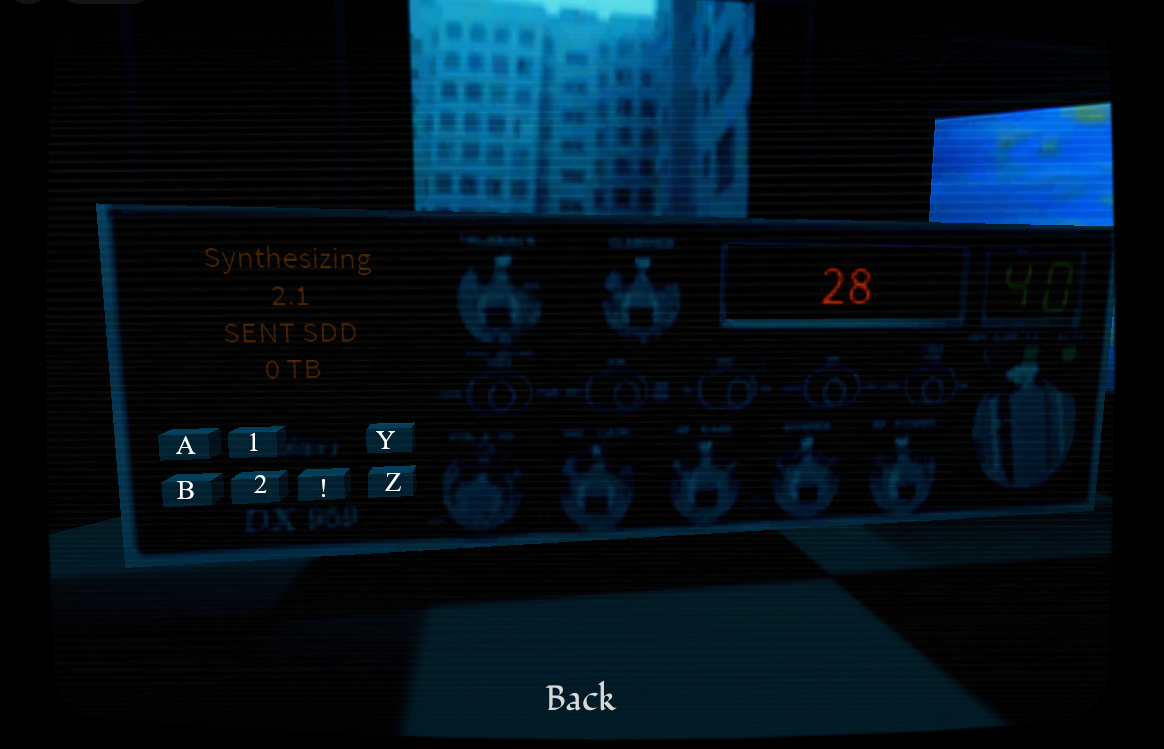
Then go back to the Sentience Module. This is where it gets a bit tricky, so I've added symbols for each button to tell you which one does what. I'll try my best to explain this!
- A & B are related. Both of these buttons affect the uppermost text, which in this screenshot reads "synthesizing" but these buttons change what it says-- A goes forward, and B goes backwards. The A & B buttons allow you to change this text to the one in the instructions, so you will have to go backwards and forwards with "A" and "B" to find the "Recording" setting as it says in the instructions.
- Once it's set to "Recording", see the next step: " ... with a delay time of 12 and 4/5 seconds." The numbers under "Recording" are the delay time, and the corresponding related symbols for these buttons are "1" and "2". "1" makes the first two digits go up, with a limit of 20 that resets to 0 if you try going any further. Set this number to 12. After the first two digits are set to 12, you're going to redirect to the button with the corresponding symbol "2". "2" makes the 3rd digit go up-- in the instructions, it says you can set this 3rd digit to either 4 or 5. it doesn't affect anything later on.
- "!" is the only button that isn't related to another. This button changes the "SENT SDD" in the screenshot to other drive types. The one you want to find is Neural HDD, which reads "NEURL HDD" in-game.
- And finally, "Y" & "Z". These corresponding related symbols affect the number of TB (terrabites) on the HDD. "Y" makes the number go up, and "Z" makes the number go down. The number you want to go for is 480 TB.
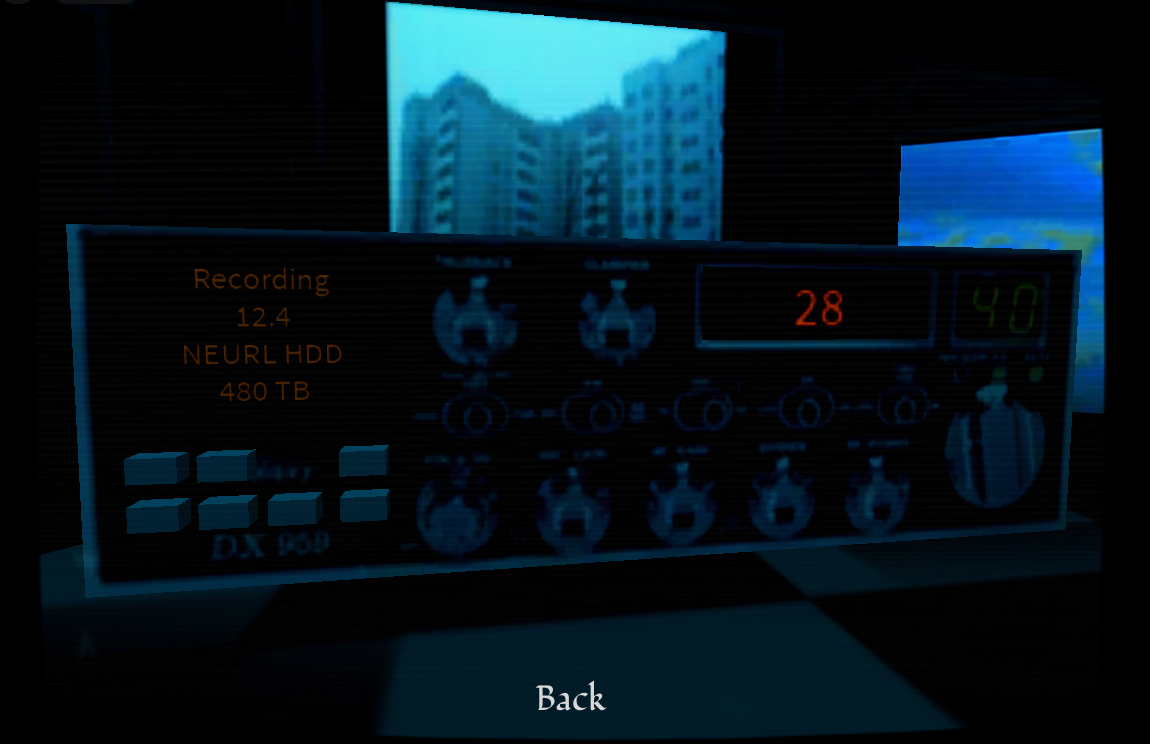
If you did it correctly, it should look like this. Besides from "28" of course, since that will likely be different for you.
----- 5. When the sentience module settings are correct, adjust your EEG to your heartrate. Then flip the primary display switch on your machine back to Startup. Switch the selection type on your visual cortex to displaying mode, if the LED is red, turn your primary display switch back to surveying. -----
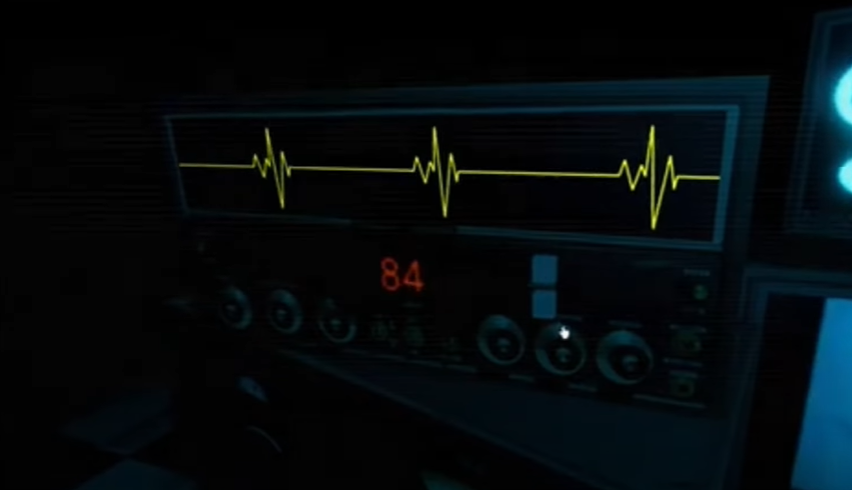
So, in my game, the improvised EEG actually doesn't work. It's just a blank screen and the buttons don't work for me. However, in PineMelon's video about this game, it works, so thank you for this photo! The two buttons change the number up and down, which you want to change to your heartrate. To check your heartrate, inspect the Visual Cortex. It should be the red number below the HDMI cord and amplifier cable.
The improvised EEG's 'heart rate monitor screen' should have spikes when done correctly, meaning it's synced with your heartrate. Your heartrate changes every time you start the game, so mine won't be the same as yours.
Go to the Lucid Dream Visualizer and flip the switch from pointing to "Surveying" back to "Startup".
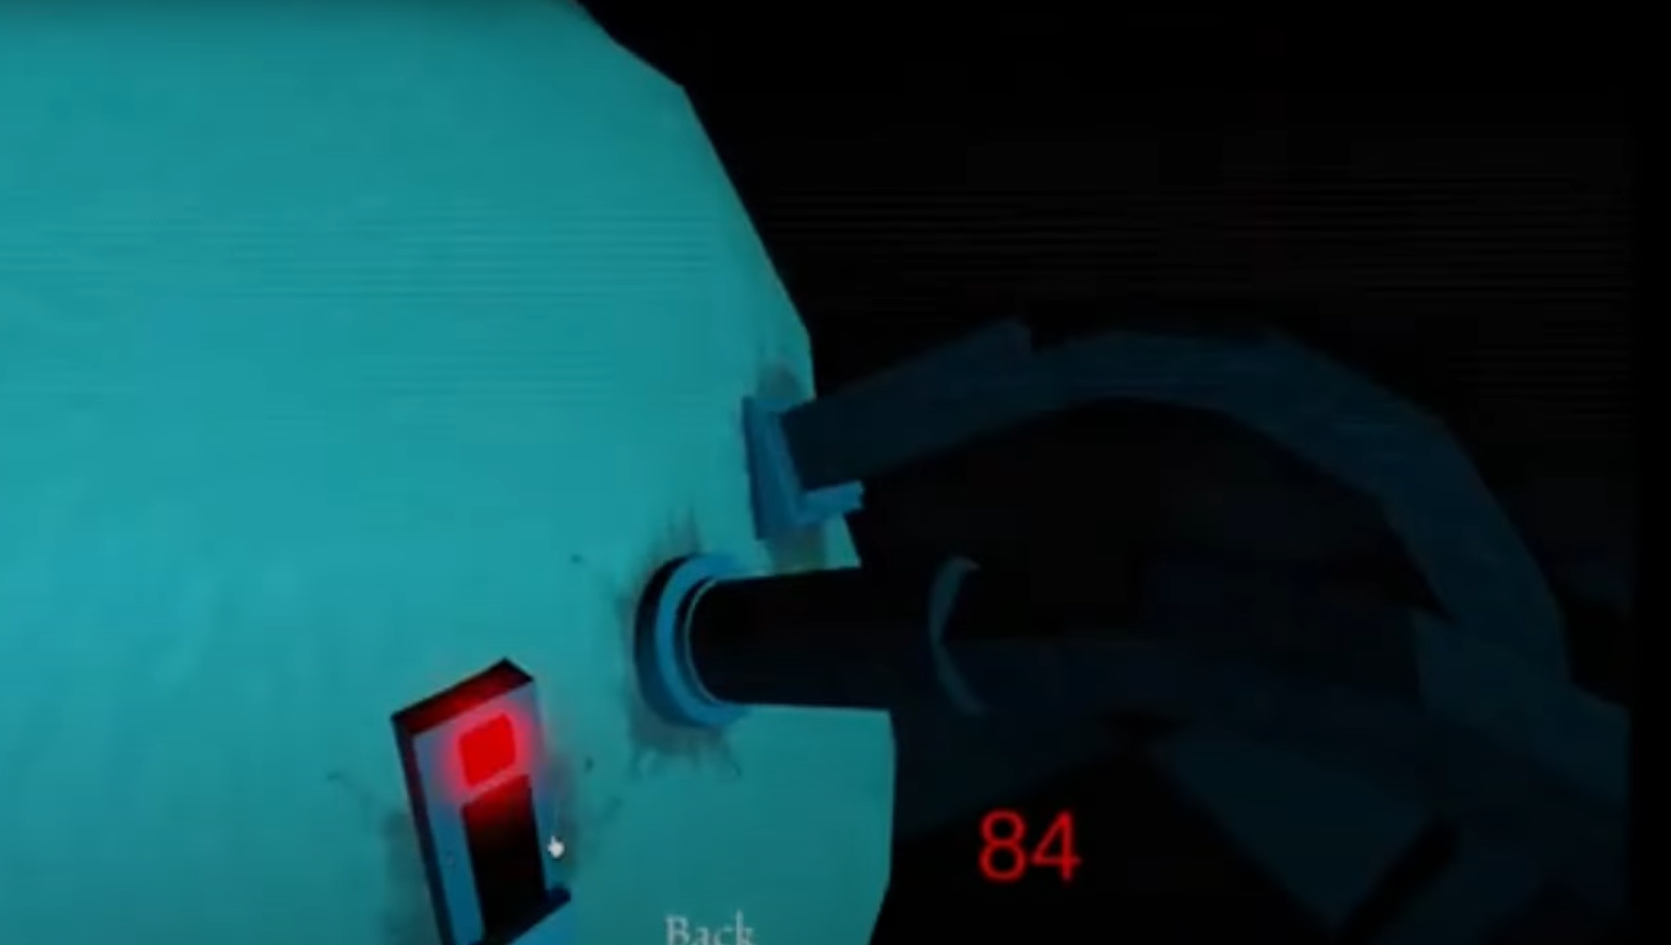
My game doesn't let me do this either, so again thank you PineMelon! Flick the selection type (switch with red LED) until the LED lights up. The LED is red, so the instructions say to go to the Lucid Dream Visualizer and flip the switch back to "Surveying."
----- 6. Lastly, turn on the main modulator. If all steps above are complete with no issues, then you are ready to experience your new reality. -----
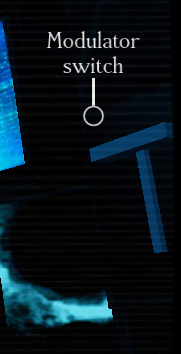
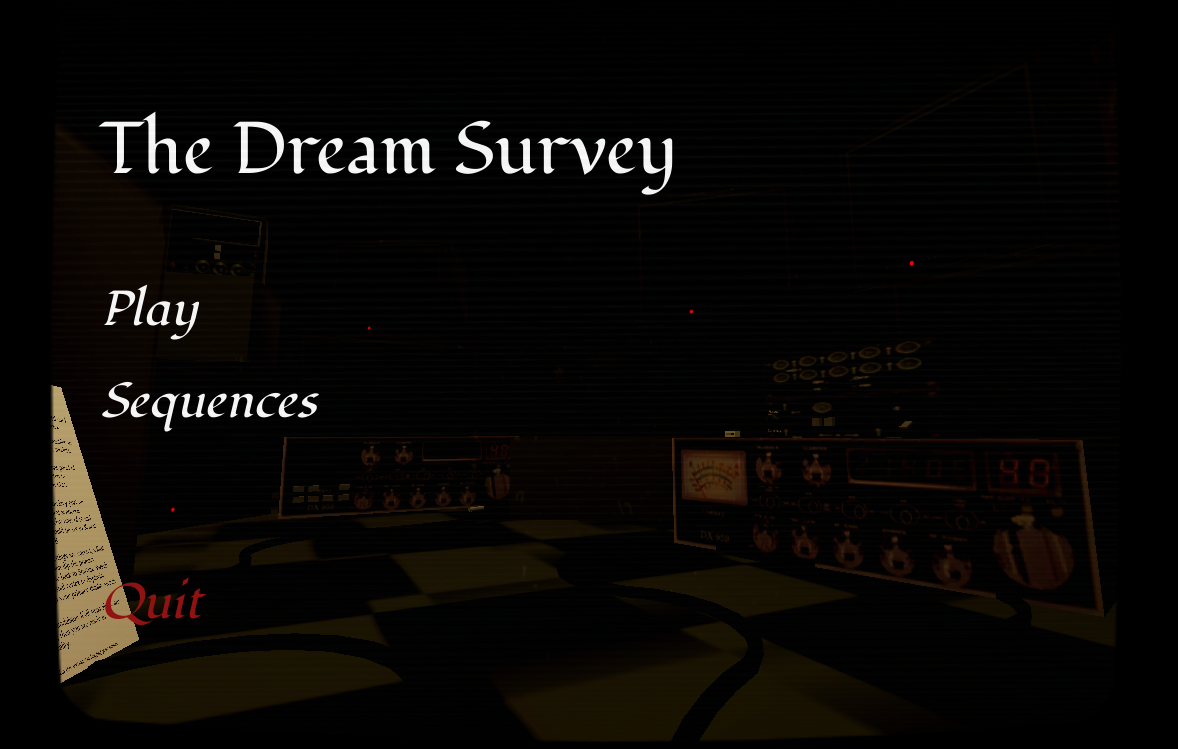
The Main Modulator is the Modulator Switch. Flick the switch, and you should be taken to the main menu. Your new reality has begun.
( P.S., if you don't want to go through this sequence every time you start the game, the developer has added that feature. At the bottom of the instruction manual, there's a small line of text that should change every time you click it, asking if you're sure you want to skip this question. If you keep going, you should hear the thud of the Main Modulator turning on, and a message saying the Main Modulator has been turned on. Then, just flick the switch and it'll take you to the main menu. )